
How to Find Digital Photo Info for Organization | Orange County Photographer (Part 4 of 4)
How to Find Digital Photo Info for Organization | Orange County Photographer

There are so many ways to organize your digital photos, as we’ve already seen. If you haven’t read the first 3 posts, then go check them out here: Part 1, Part 2, & Part 3 {insert link when posted}
We went over labeling and tagging images in our first post and we are going to circle back around to that same concept in our final post here.
One of the most important pieces needed for organizing your images is having a description to go off of that explains a little about the image that was taken. This is very helpful because it allows you to categorize them based on where they were taken, when they were taken, etc. We covered how you can set yourself up for auto categorizing them when you take the picture, but what do you do if the picture’s already been taken? How can you find when and where it was taken after the fact?
Well, luckily, there is a way to do that and that’s exactly what we’re going to explore today!
How to Find Digital Photo Info: How do I find where my picture was taken?
I will start this off with something very important. The reason that photos can be traced to find where they were taken is because of something called Geo-tagging, which automatically tags the photo with location information. For this to work, the location tagging setting has to be turned on when the digital device is used to take the picture. That being said, this may not work for every image that you come across, but it is a good start.
Microsoft Windows
If you happen to be running Mircosoft Windows on your computer, then these are the directions you want to follow:
- Download the photo to your computer
- Right-click on the image
- Select ‘Properties’
- Click the ‘Details’ tab
- Look for the ‘Latitude’ and ‘Longitude’ coordinates under GPS
Mac Users
If you are using a Mac, then simply do the following:
- Download the photo to your computer
- Right-click on the image (or, Control-click it)
- Select ‘Get Info’
- You’ll see the ‘Latitude’ and ‘Longitude’ settings under ‘More Details’
Take it to Google
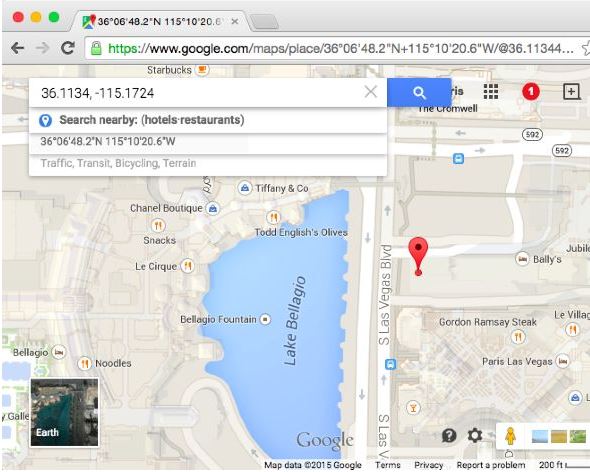
Now that you have the ‘Latitude’ and ‘Longitude’ information, head on over to Google Maps to find out where the image was taken.
Once you’re there, you can enter the latitude and longitude information with a comma in between, then sit back and watch as it pulls up the location of where your image was taken. Just like this:
And you’re finished! Now you know exactly where your photo was taken and you can now use that in categorizing your images!
How to Find Digital Photo Info: How do I find when my picture was taken?
This is fairly easy, now that you know how to look up the latitude and longitude on your computer. You will simply follow the same steps, up to the point of seeing the details for the photo. Underneath the details, you will just look for the section that shows the date and time that the image was taken. Voila!
Now get out there and start tagging your photos!
Thanks for reading this blog on Organizing Your Digital Portraits!
The Kincannons
Part One | Organizing Digital Portraits
Orange County Family Photographer, Kincannon Photography is a professional photographer in Orange County, California capturing newborn, seniors, dog, children and family portraits.
Kincannon Photography is based in Yorba Linda, and serves all surrounding areas including Newport Beach, Irvine, Corona Del Mar, Brea, San Juan Capistrano, Aliso Viejo, Mission Viejo, Costa Mesa, Fullerton, Villa Park, Laguna Beach, Newport Coast, and other surrounding Orange County metro areas.
Be the first to comment